The first impression matters. Moreover it starts the way a relationship or conversation goes. It applies to websites too! And it’s the front-end developer’s job to create the best first impact to the users.
But isn’t it a little bit overwhelming? We all started from the bottom and there are a tone of hidden things we didn’t know about. Or maybe we just got caught up with an annoying bug and forgot something and the site crashed. Either situation, it’s more frustrating than it sounds.
This material will be of utmost help for beginners especially. However the experts can check it out too. It’s never bad to double-check!
We are talking about an amazing tool. Let’s go a bit into it, shall we?
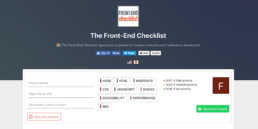
Frontendshecklist.io helps you check all the important thing you have to cover in order to create a functional website. There are a few titles which you’ll find on this website. They are categories:
- Head
- HTML
- Webfonts
- CSS
- JavaScript
- Images
- Accessibility
- Performance
- SEO
It covers everything. And beware, there is more.
How to begin?
At the beginning you will see a content box and some fields to fill. You write the name of the project, your page title or URL and your name, or the team’s name.
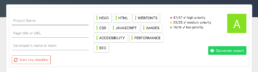
Then, if you look on the right, you will find the categories. You can click on the one you want and it will automatically scroll down.
If we go even further in the right you will see a list, formed with coloured dots. Each color represents the level of priority. Then you have the mark. Try to get an A, that means you’ve fully completed the checklist.
The controls
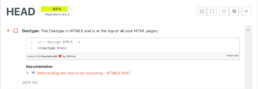
On the right of each subheading (such as Head, HTML, CSS, and so on), you will find some controls. First you will see a checked check box. If you click that, the entire category will be checked. If you click on the one near the first, you will deselect all the checkboxes. Of course you can individually check the boxes as you go through them with your work.
Then you will see a + and a – icon. If you click the plus button, you will open all the sub-menus of each checkpoint. There you can find the the exact code that you need to import into your html file. This is amazing! Moreover, there is also a section (in the same place with the suggested code) where you can find the documentation. The documentation explains you exactly what each line of code does.
Finally, if you click on the eye icon, it will hide the entire category. It is very useful, imagine being almost done with your project and having to scroll half an hour to reach the final category. Annoying, isn’t it?
At the end, you just generate the report to keep your own history and Start the new checklist!
Use it and abuse it! But don’t forget to tell us your opinion about this amazing assistant tool. Do you find it useful?